
I wanted a slightly faster aileron trainer and was looking for a design that I could apply modern build techniques. I selected the LS-1 designed by Carl Maas and Mike Reed from the early ’90’s. The plan is available from;
http://www.inlandsloperebels.com/isrplans.htm
This plane was originally designed for the Charles River Radio Control Club and was intended to help members build their own. There was also a commercial version built by Sig called the Sig Ninja.
Since the glider has a weakness around the wing seat and classically suffers breaks before and aft the wing seat I wanted to build a fibreglass/carbon fuselage and glassed sheeted foam core wing construction.
Fuselage Build.
I decided on the “lost foam” technique. This requires cutting and shaping the fuselage from Extruded Polysytrene (EPS) and glassing this.
I bought a sheet of EPS from Wickes;
http://beta.wickes.co.uk/Space-Board-Eco-Insulation/p/161297
I printed a copy of the fuselage plan and then glued this to light cardboard. This shape was then marked on the foam. The shape was then cut out using a saw. I wanted a slender fuselage and therefore trimmed the foam cut out to 40mm. This was based on the width of a 4XAA battery pack but a 1500maH 3S lipo pack with a BEC would also work.
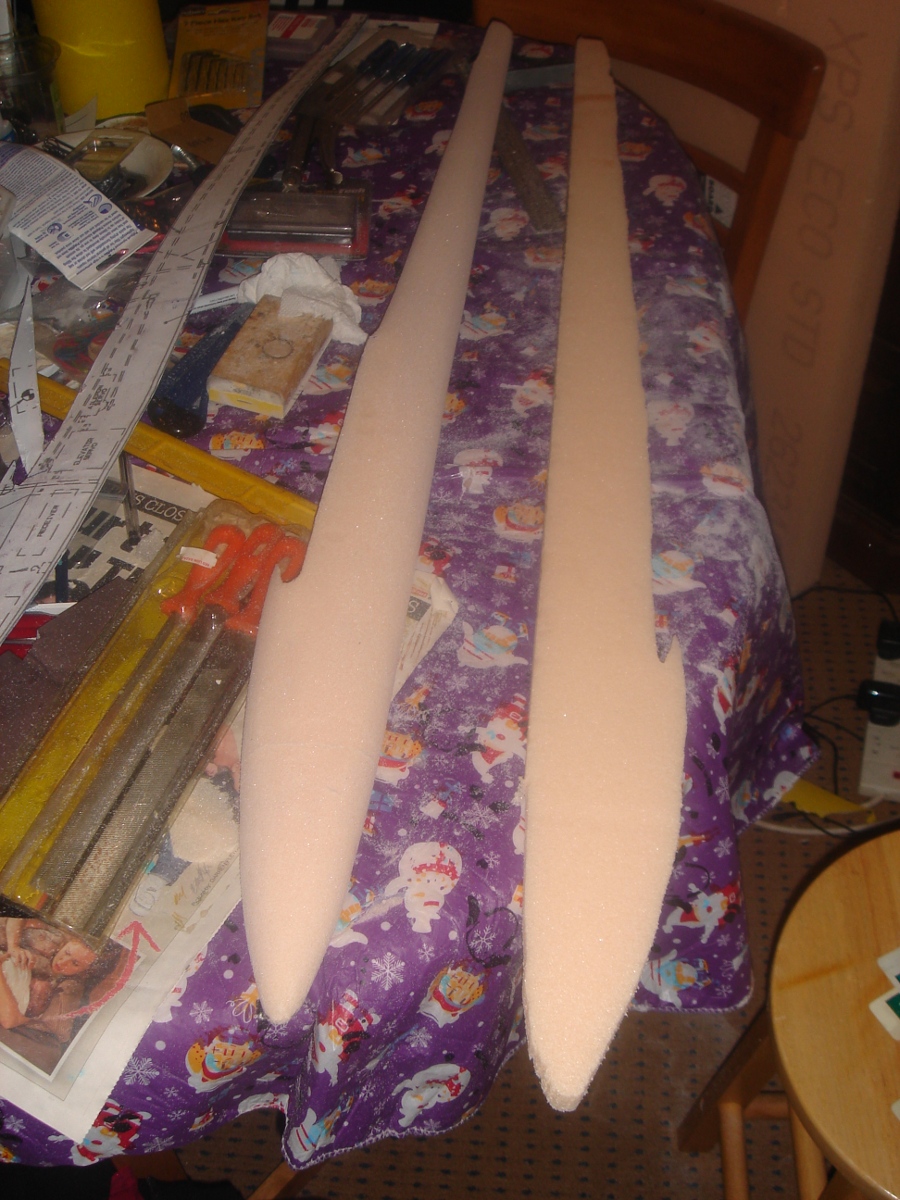
In the picture above the fuselage has been shaped using mainly 80 grit sandpaper on a small block. The piece on the right is the section cut off to narrow the width.
Like any build it was important to get the centre correct and line everything with reference to the plan. The finished foam core was covered in packing tape to protect it from the resin. The packing tape was coated in a wax furniture polish to aid release from the resin.
I used the old polyester resin system mainly because of the cost and not knowing how it would turn out. I have used this many times before and am comfortable using it. Instead of buying cloth I used 50mm fibreglass re-enforcing tape. This is 200g/m. I used 2 strips from the nose to a quarter of the length of the tail on each side. Having wetted that out with resin I added a length of carbon tow along each side. This was to re-enforce the weak area of the fuselage. I then wrapped using overlaps along the whole fuselage starting at the tail. Having wetted that out I wrapped the whole thing in insulating tape to bind it tight. The theory being that the wrap would add cross weave and strength to the structure. This was left to cure and when set the insulating tape was removed. The whole fuselage was then sanded using 60 grit sandpaper. Some areas required further glassing where bubbles had formed.
Satisfied with the finish the foam could be removed. The wing seat was then cut out in preparation for the foam removal.

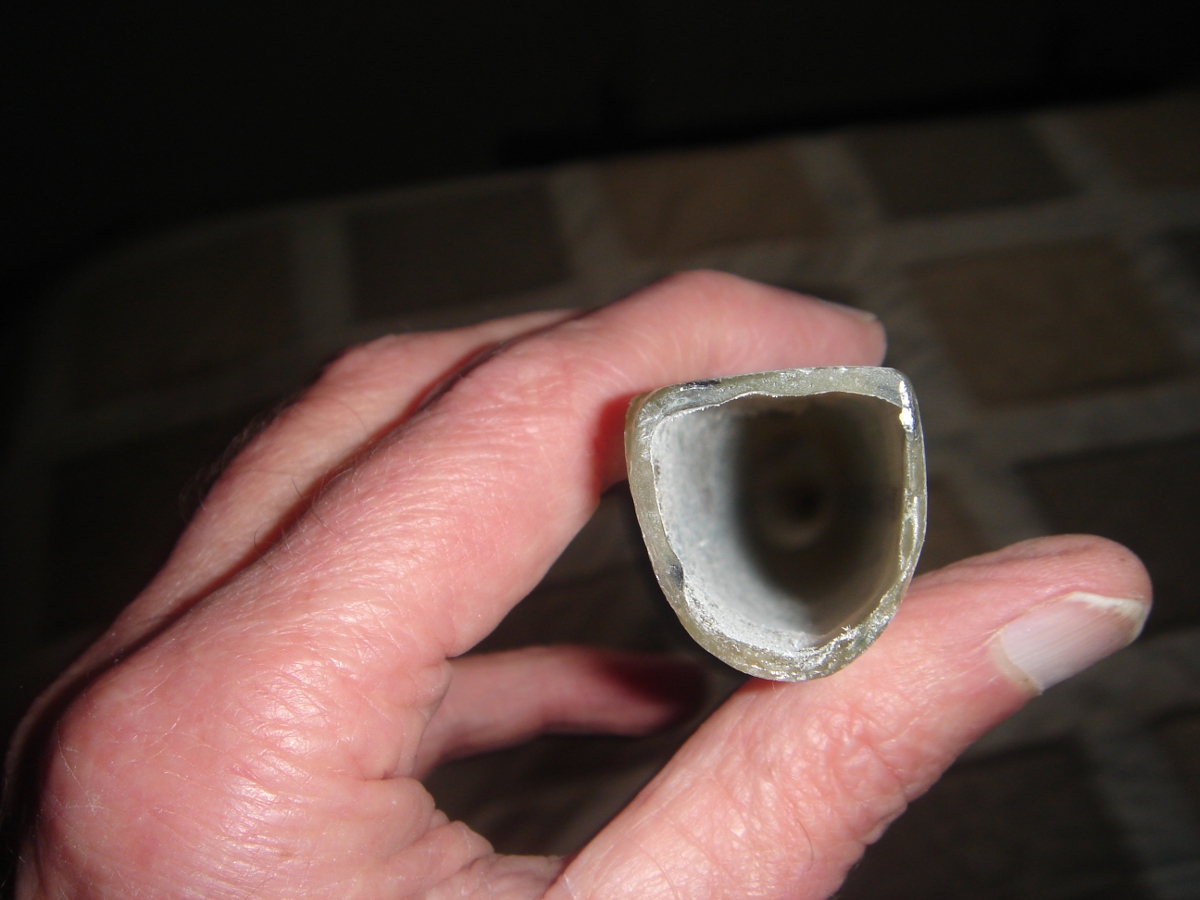
The magic can now happen. By pouring in a small amount of acetone the foam is reduced to a lump of pink goop which slid out of the tail opening. The packing tape could then be pulled out of the fuselage.
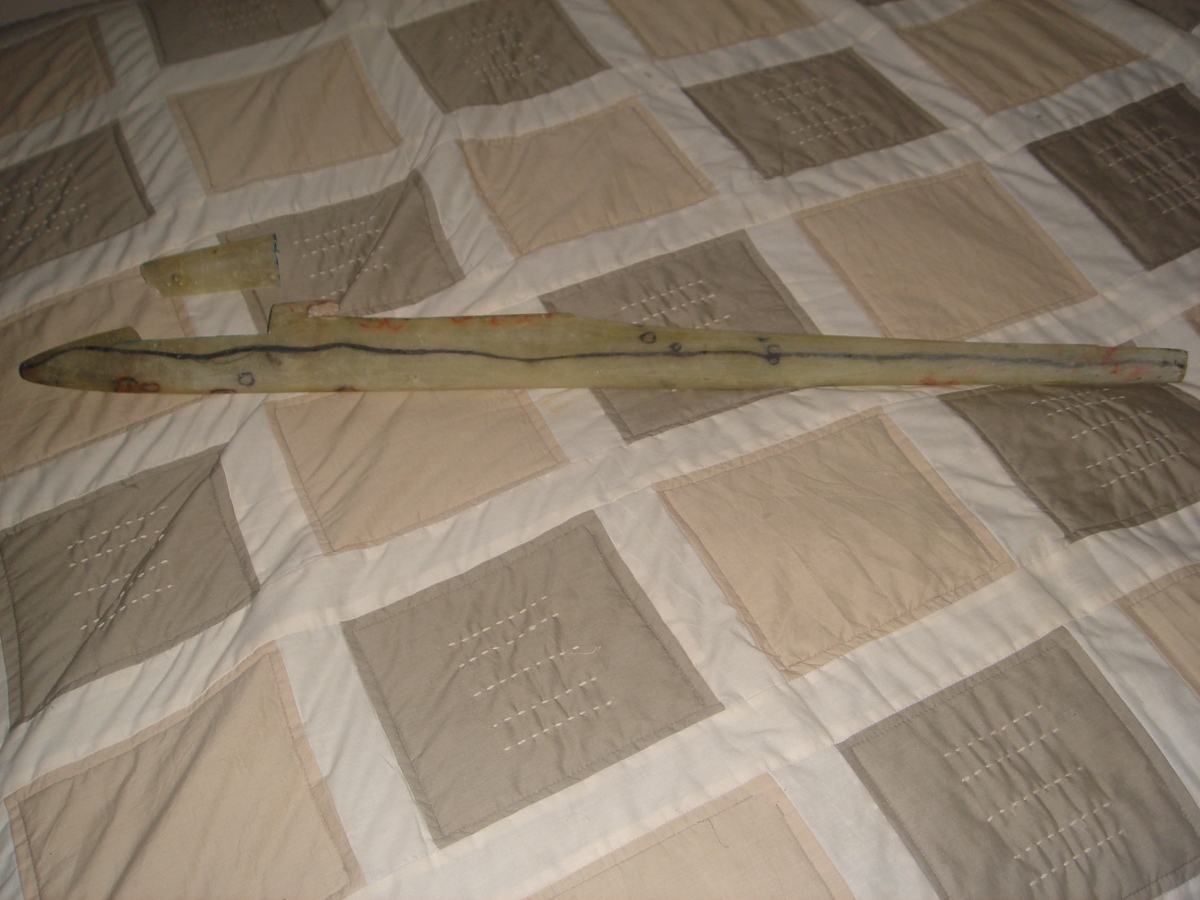
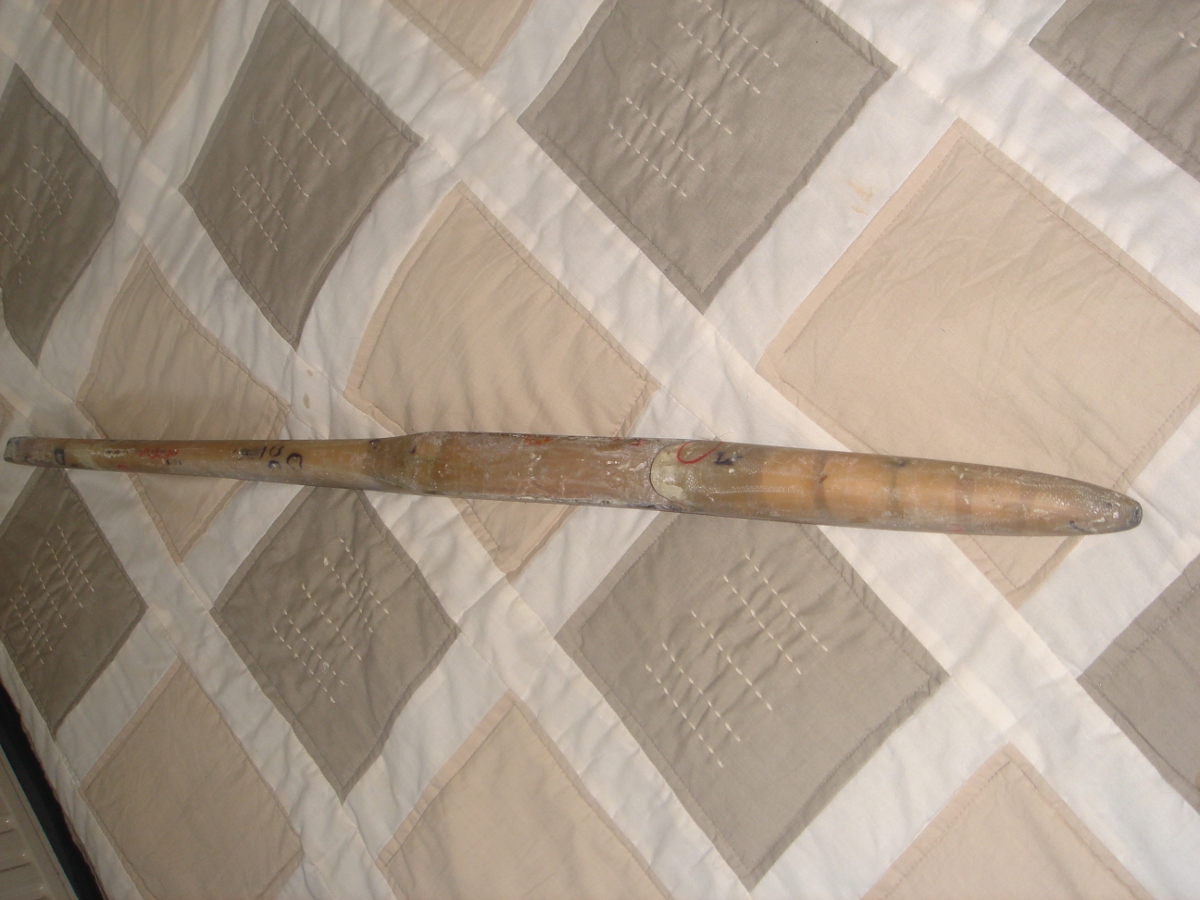
So above the finished fuselage with the canopy in the front cut out. The black carbon along the length of the fuselage is visible.
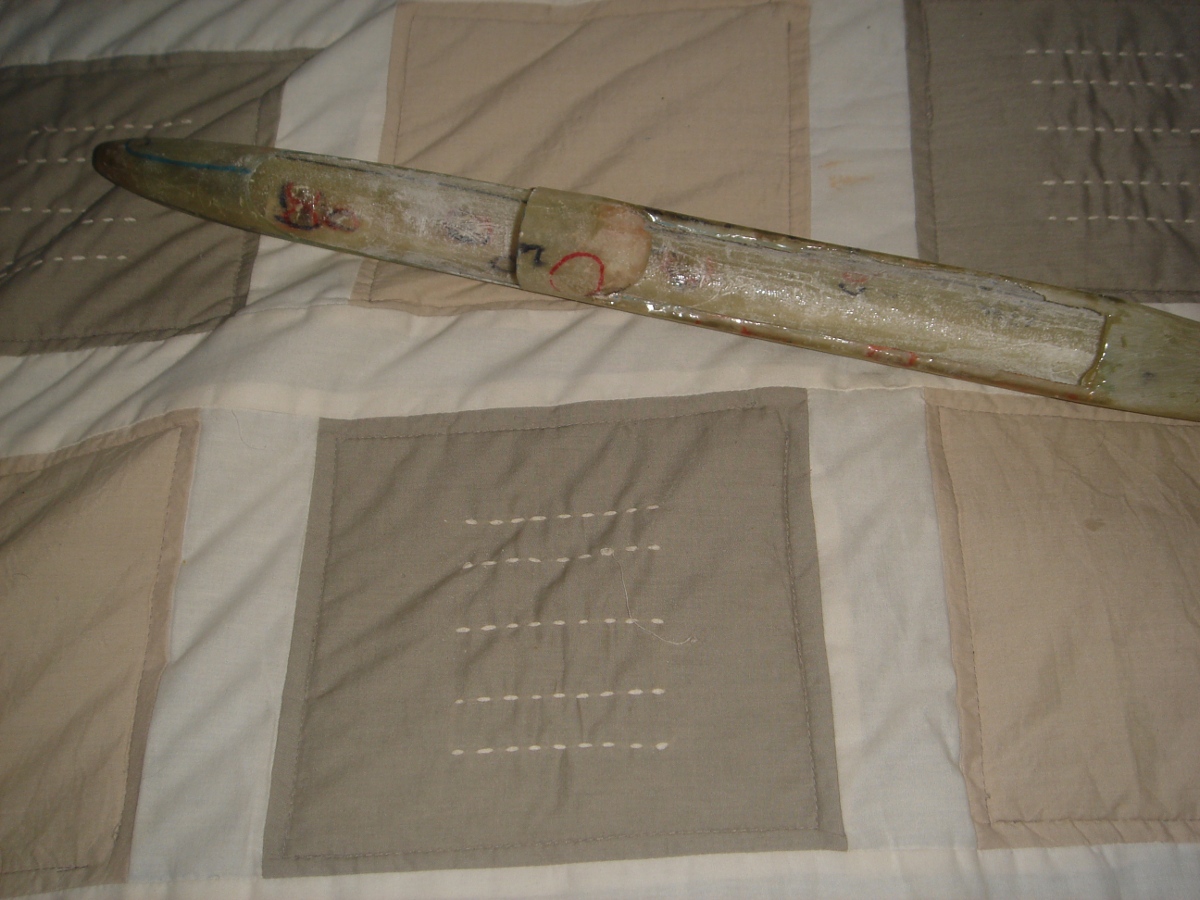
The red and black rings are just marks showing me where bubbles were and needed filling.
Wing Construction.
The wing was to built in stages. I decided to use the Eppler E374 airfoil. The original used the SD6060 which is very similar. This is a tapered wing so the initial step was to get the airfoil shapes based on the width at the root and tip. Having measured the root and tip I used an on-line source to print the airfoil outline;
http://airfoiltools.com/airfoil/details?airfoil=e374-il
The next job was to make the airfoil shapes using plywood. The wings were to be cut in 2 cuts. The first was the lower cut and then followed by the upper cut. So two formers had to be made.
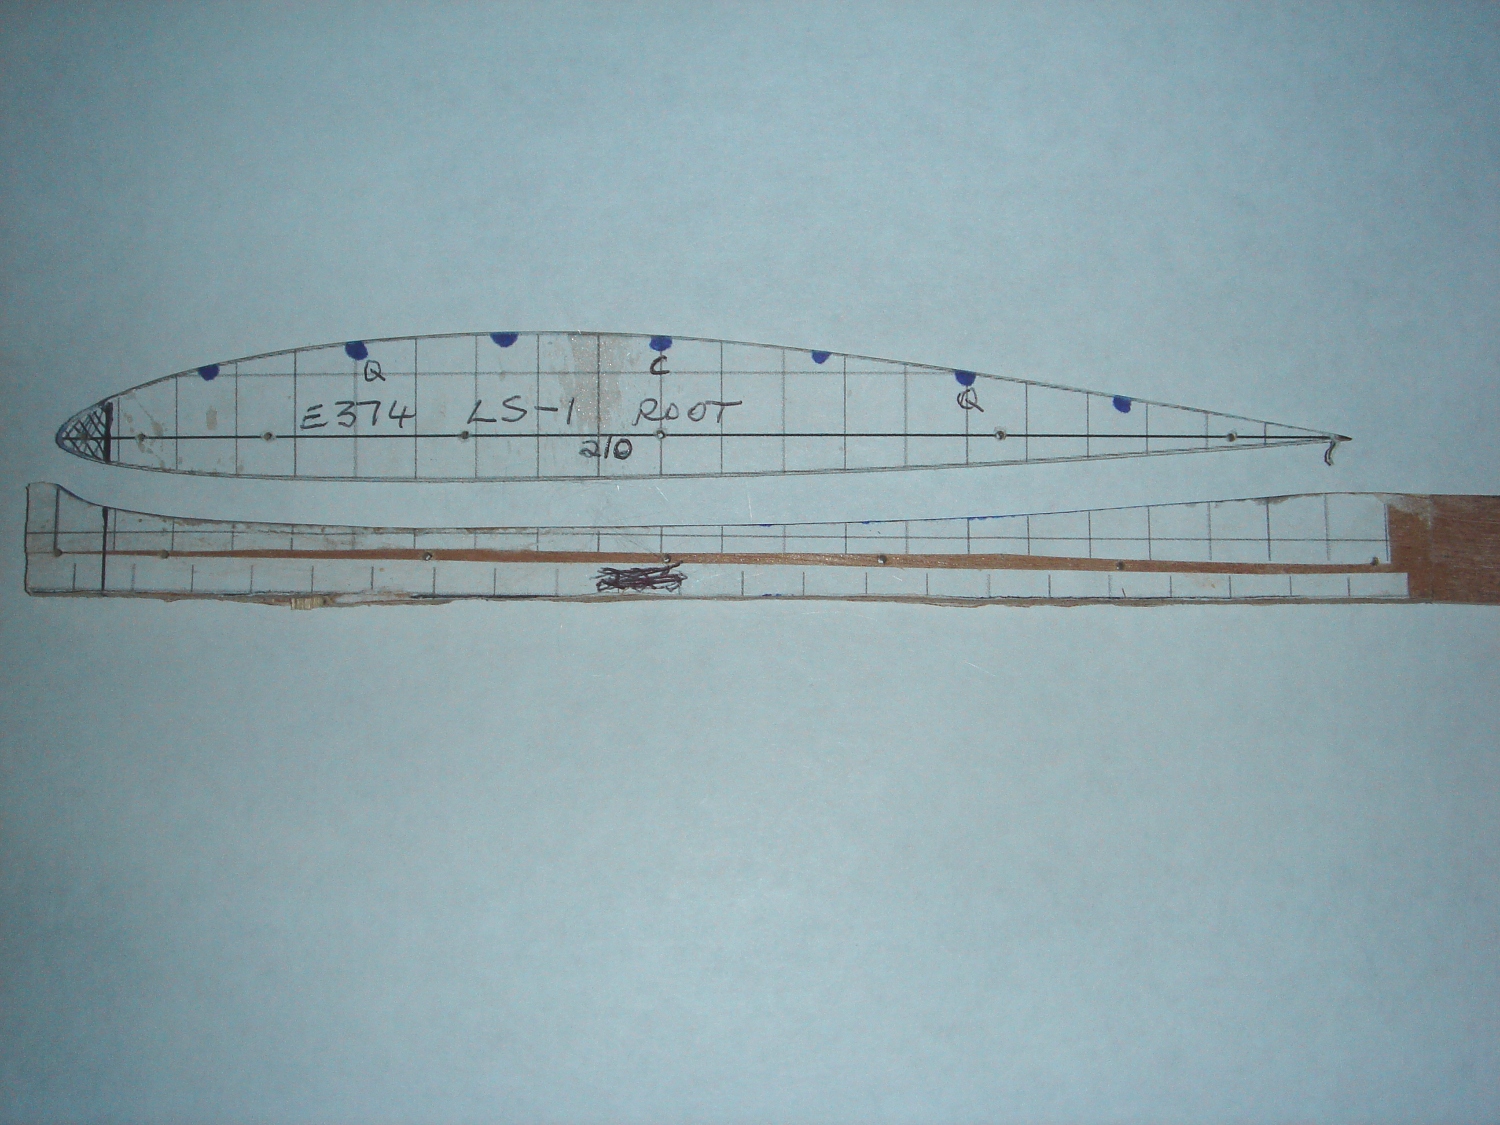
Because I was going to use a balsa leading edge I marked the size on the profile and the cut on the leading edge started at this point. The lower former has lead-out section to allow the hot wire bow to move away from the work. Each surface of the former was covered in candle wax before each cut to smooth the flow.
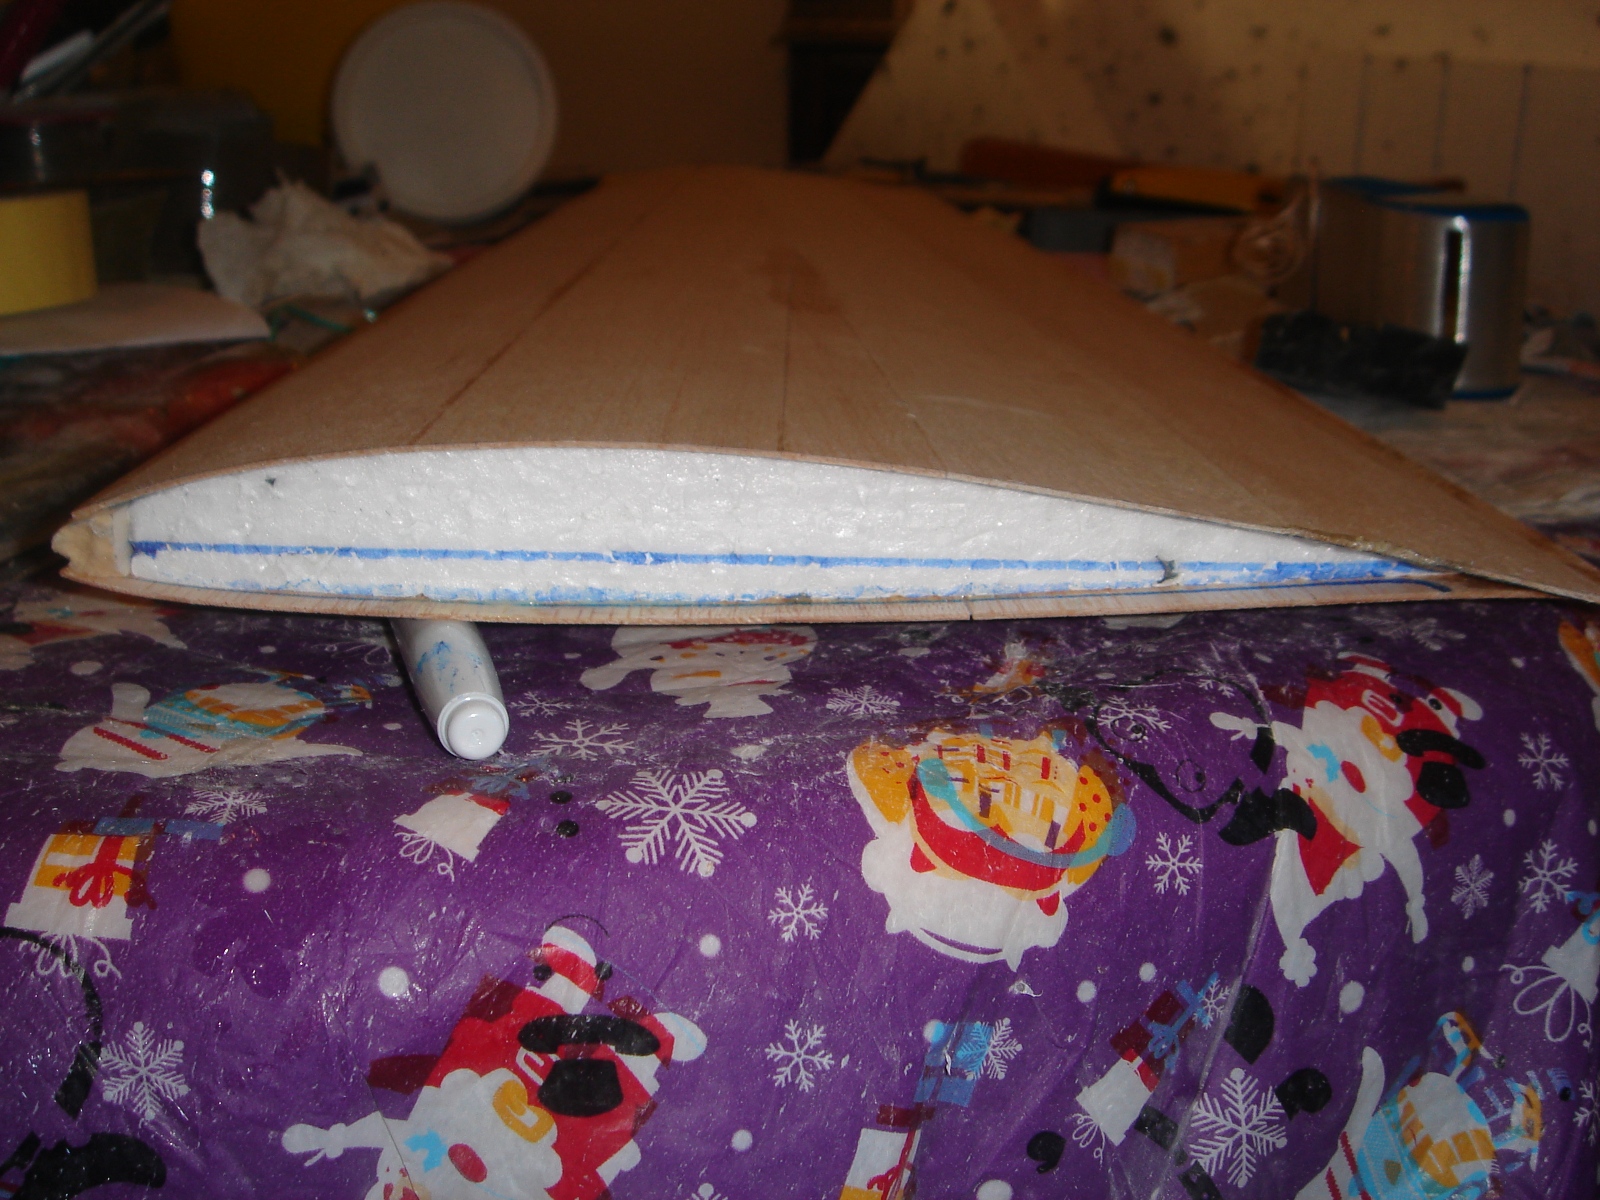
I used ordinary polystyrene for the cores as this is much lighter than EPS. The shape for each wing was marked and then cut by hanging the hot wire bow along the line and then powering it up so that it cut by its own weight. This produced a very straight cut.
The centre line on each end was marked and then the tip was raised 10mm to get the correct dihedral at the root. The centre line of each former was lined up. The tip former was twisted 2mm down at the front to get some washout. The cuts were made by pushing through from front to back with someone watching from the side to get the correct speed for the taper. It took 3 attempts before getting the correct speed for the first wing. Each wing was kept in its wing bed. They were then filled with Wickes light weight filler and sanded in their wing beds. Having thoroughly removed all dust they were ready for sheeting. I used 1/32 balsa sheets. 3 sheets were butt jointed with wood glue. The front sheet parallel with the leading edge, 3rd sheet parallel with the trailing edge and the middle in a wedge shape. I allowed a lot of overlap. Now I was ready for the gluing of the sheet to the wing core.
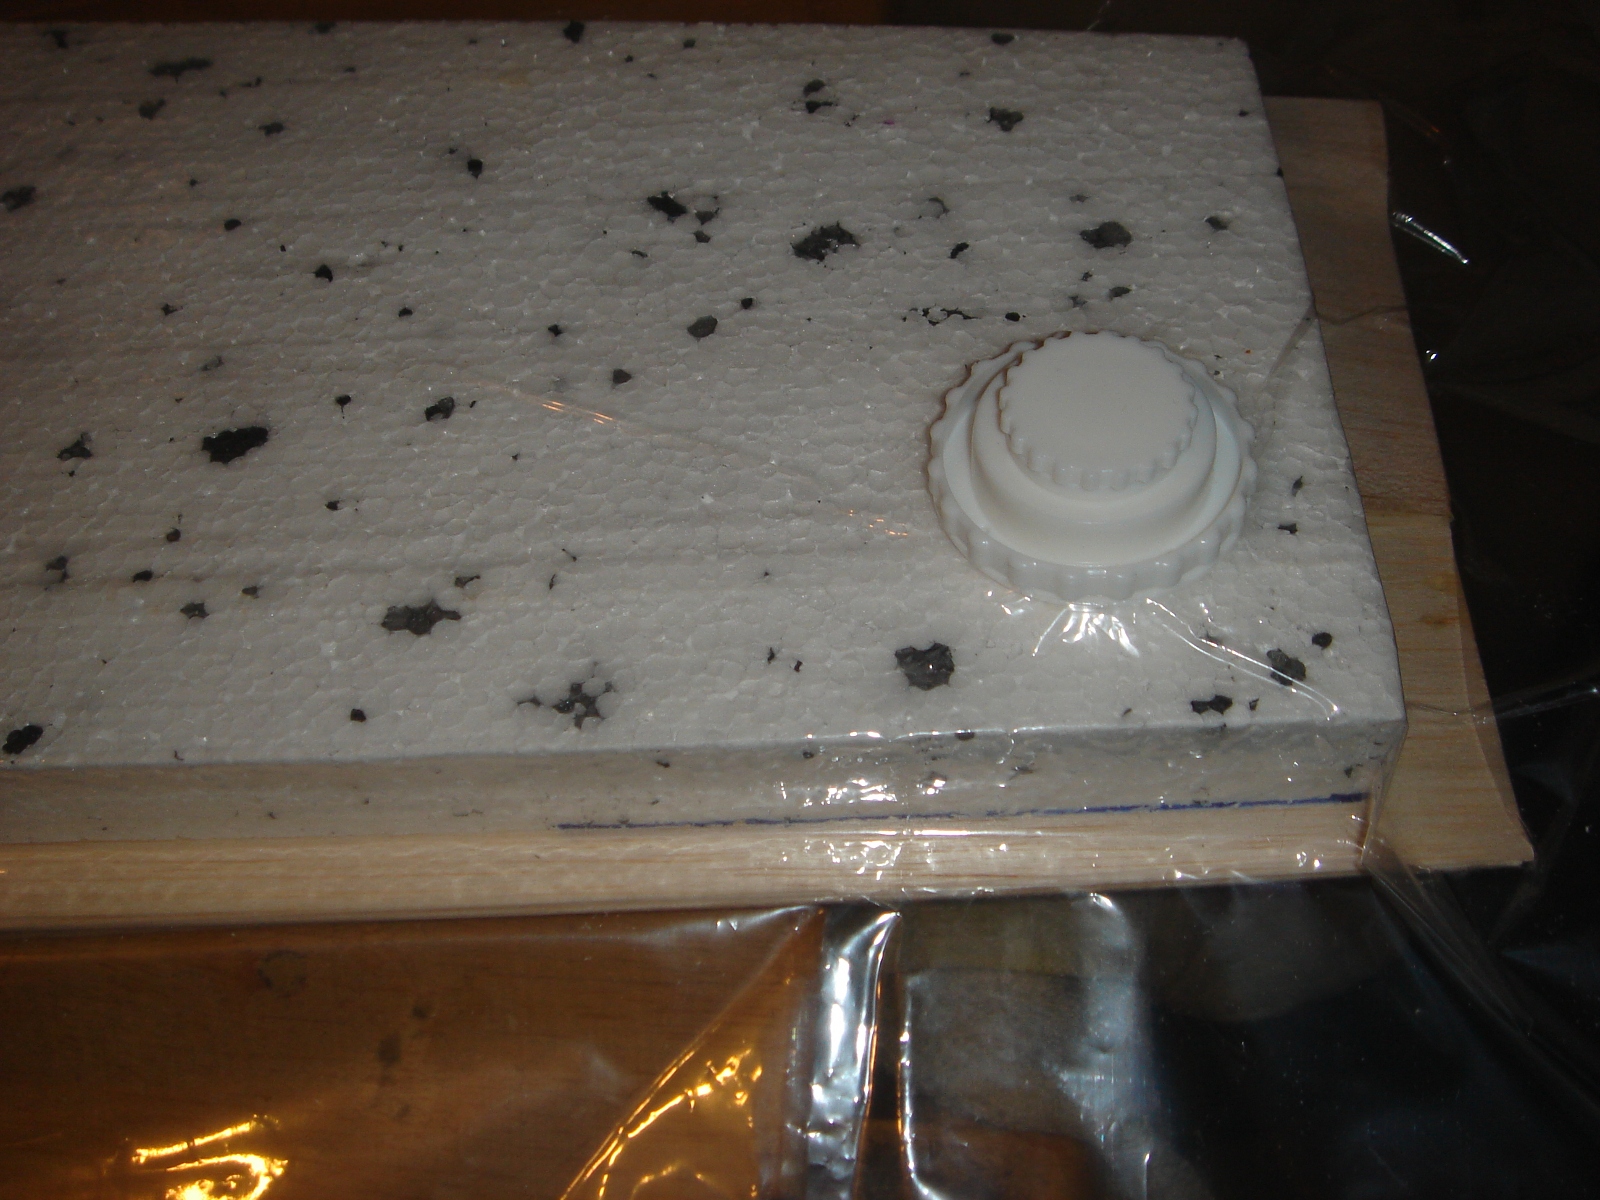
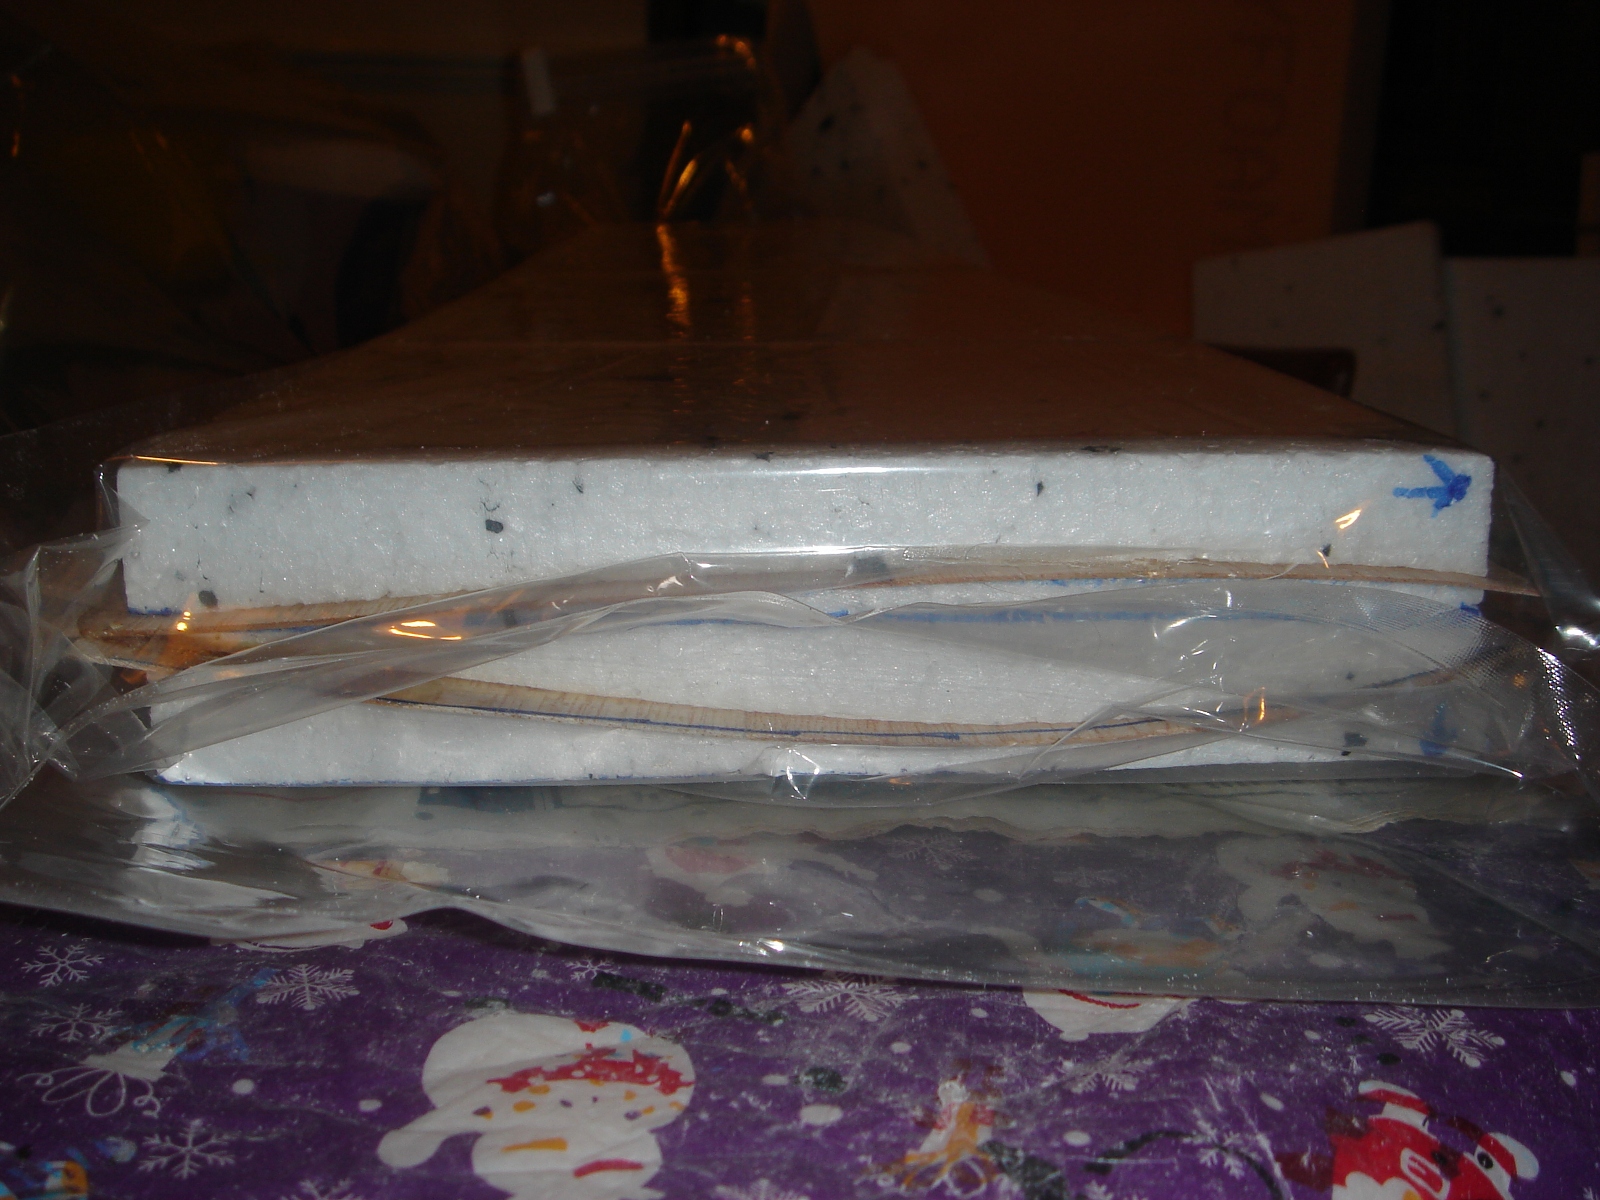
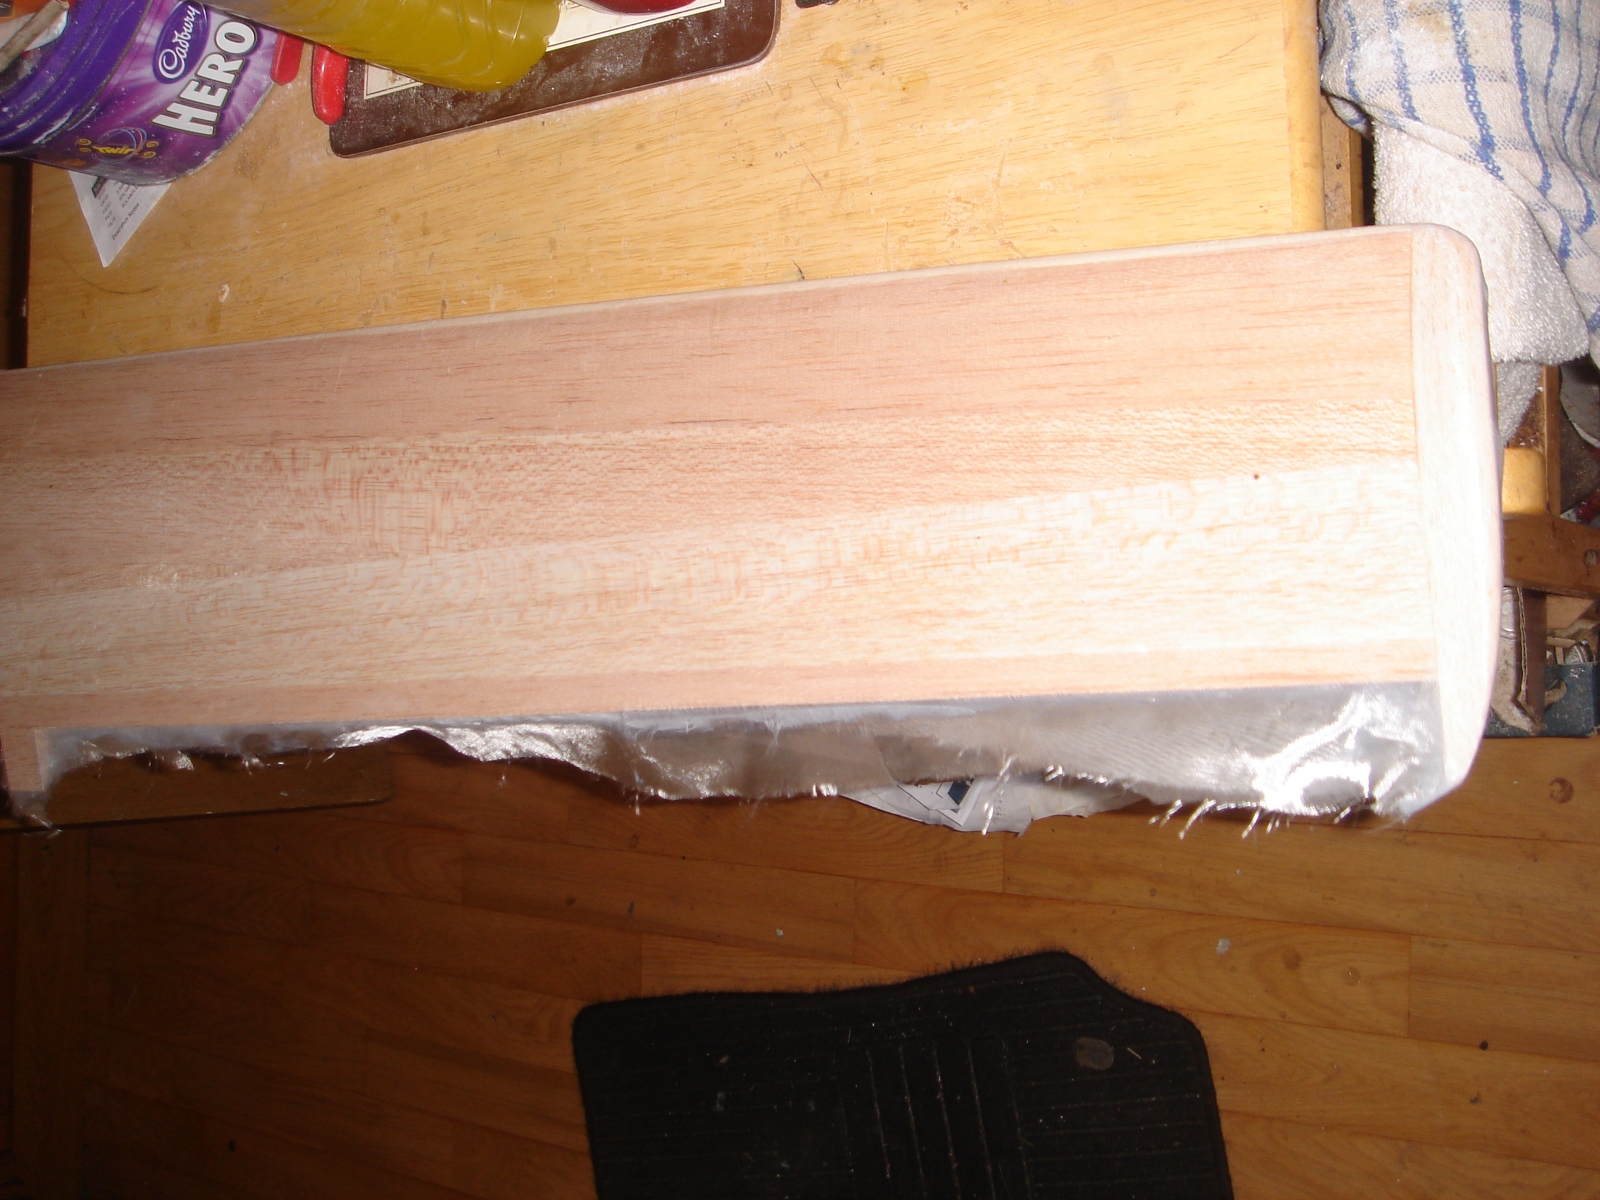
Each sheet was coated in a light coat of polyurethane glue (Gorilla) and the cores sprayed with a light mist of water. The sheets were then applied to both surfaces and they were then placed in their wing beds and into a domestic vacuum bag and this was vacuumed using a household vacuum cleaner and left for an hour.
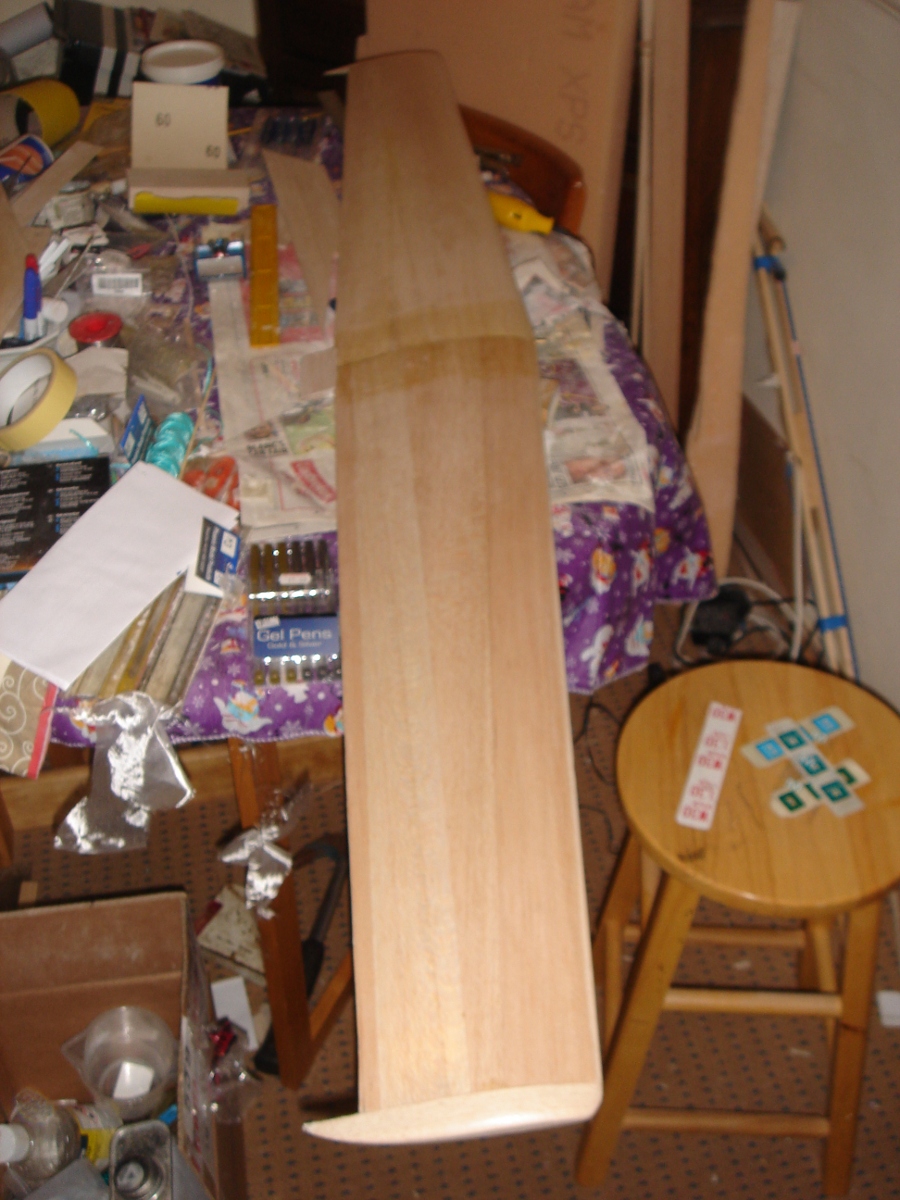
Once set they were removed and the leading edge could be glued in prior to planning down the edges.
The ailerons were then marked and cut out at this stage and wing tips added. With all the trimming and sanding done they were ready to be glassed. I use 17g/m fibreglass cloth. This is applied using water based polyurethane (WBPU). The work is sealed using an oil based sealer. I then layed the cloth and started applying the polyurethane from the centre and worked out. I then coated with a further 4 coats to fill the weave.
Following this I made a paste of talcum powder and WBPU which has a consistency of thick cream and this was applied and sanded with 240 wet and dry until a glossy finish was achieved. I actually weighed the wings in this process and the glassing only added 18g to the weight of each wing half. The wing halves were then ready for joining. They were joined again using polyurethane glue and then glassed with polyester resin and two layers of light weight glass cloth.
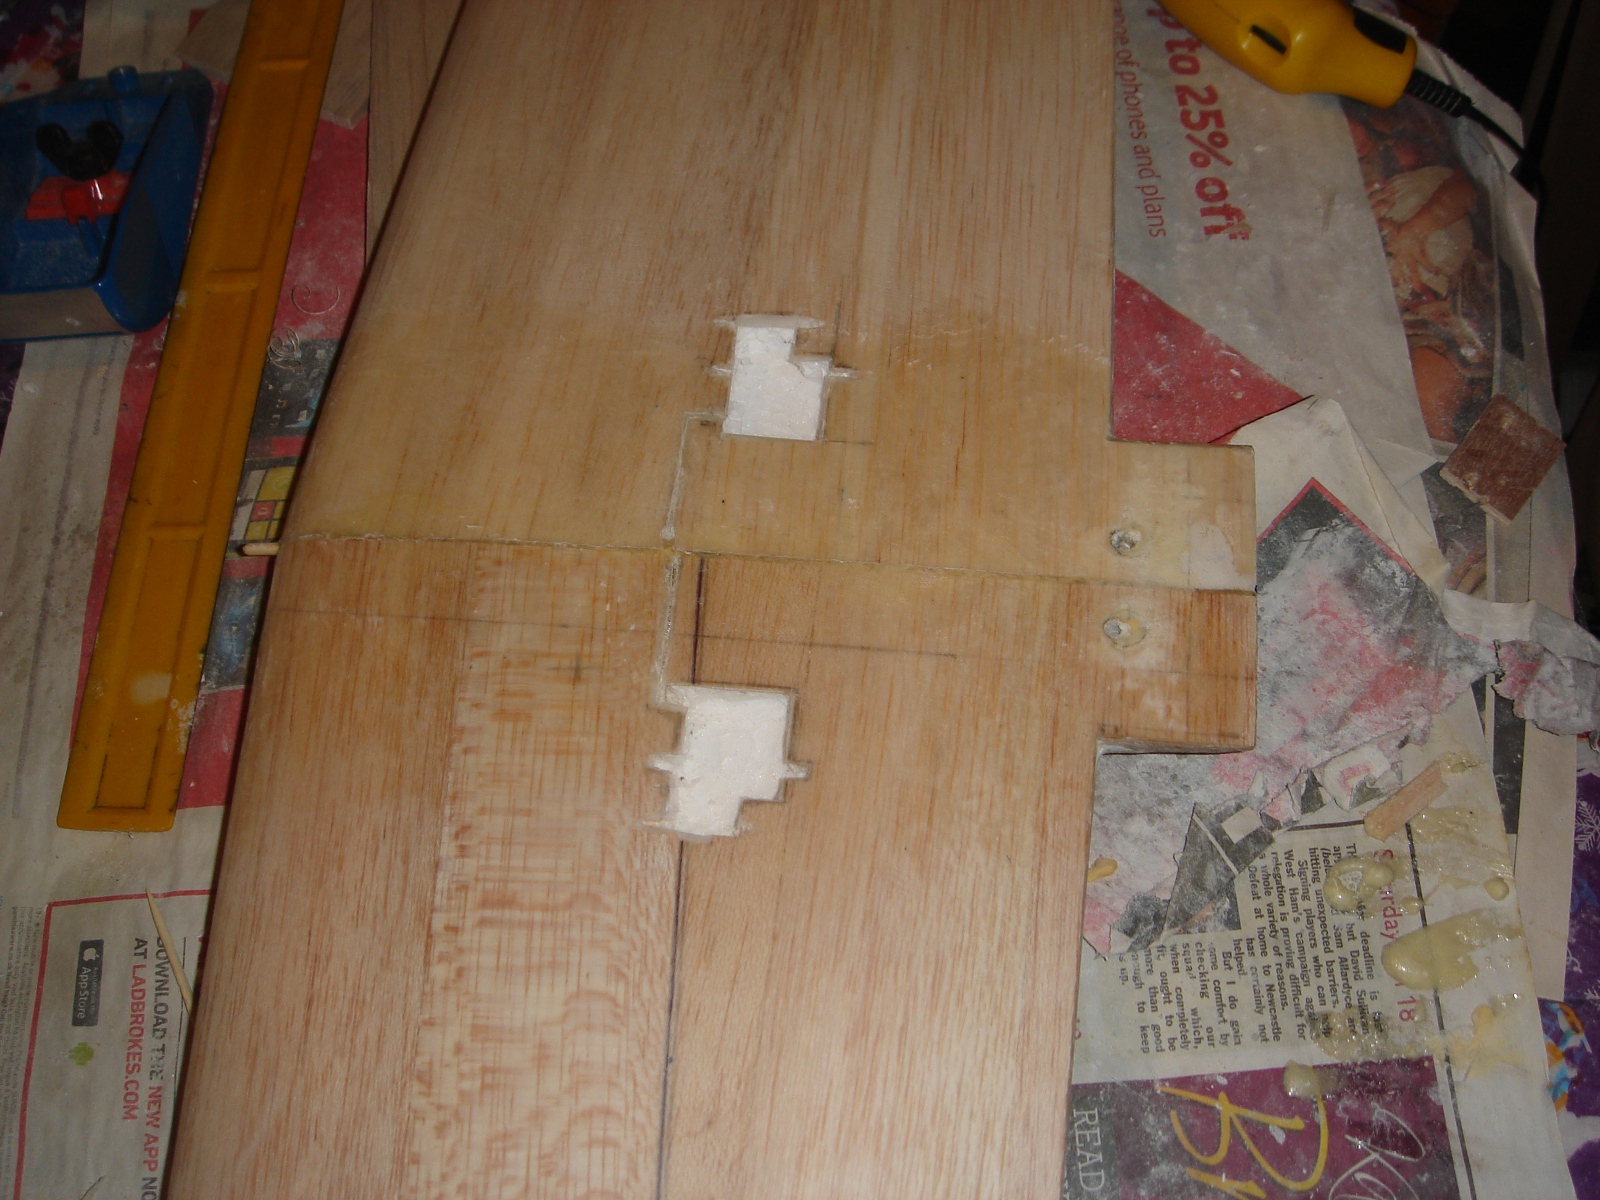
So the next job was to site and cut out holes for the wing servos.
So with the tail feathers cut in 5mm balsa it was time to setup the radio equipment prior to covering. Since this is a aileron elevator model it required the single servo.
The model was covered using Hobbyking covering for the wings and tail and Solarfilm for the body. The HK covering I found very good but needs to be used immediately the backing is taken off. It is very heat tolerant and is excellent value for money.
Once covered the model needed balancing. The nose weight required turned out to be 130g which was much higher than expected. I probably over did the thickness of the tail of the fuselage but the all up weight at just over 1kg is not that excessive and is about par with similar models of this class.
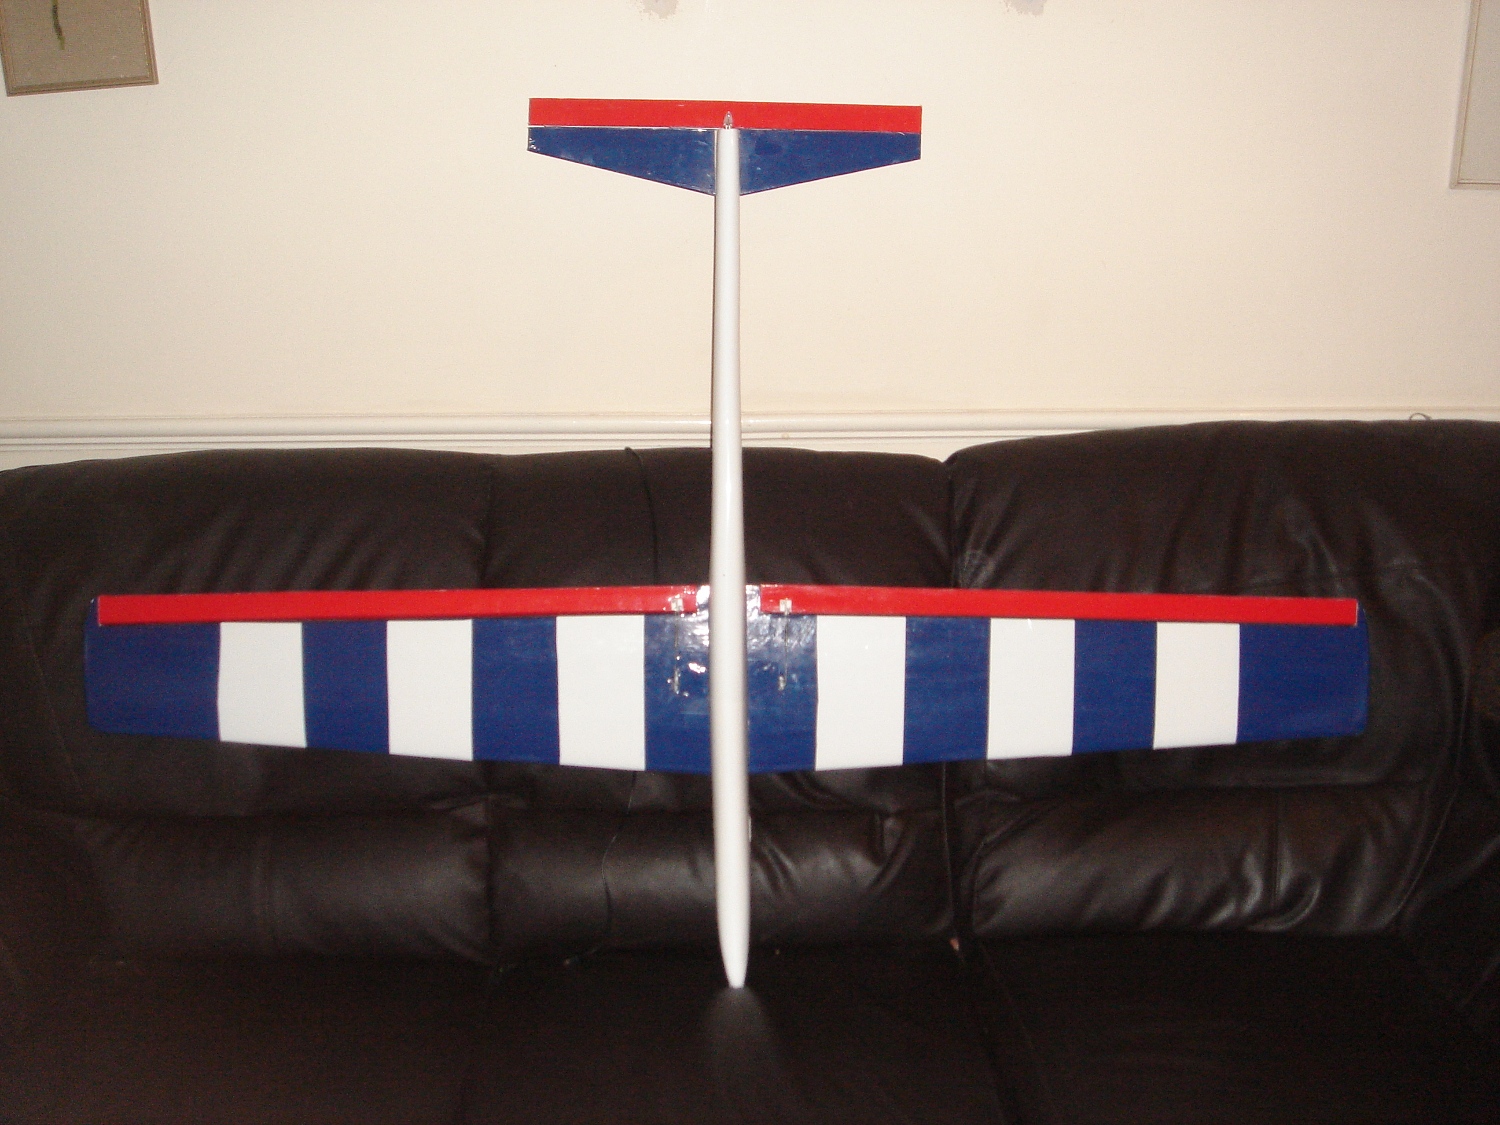
The end result;

The initial glide tests were disappointing. The model appeared nose heavy and there were indications of problems with lift. Removing some nose weight to move the balance point back 10mm helped somewhat but still the wing was showing no lift and it was a bit like flying a brick.
Some detailed examination and discussions with other club members indicated a possible problem with the angle of attack. So back to the wing seat and skimming off 5mm on the trailing edge of the wing seat changed this. Further glide tests showed positive results and it it was showing a strong level glide for a distance of some 60m with a good push off. Glide was straight and true and good elevator response. She likes to fly fast so a nice blow and good lift should see her flying. Cross fingers for a good result on her maiden. Will keep you posted.
Thanks for reading.
Regards,
Rob
15 April 2014
XCWeather indicated some good consistent ESE winds between 12 and 20 MPH so arranged with Dave to take a trip out to Gibbet Hill, Mary Tavy, to give it its maiden flight. Dave had brought his aerobatic glider and he put this out to check conditions. Lift was fairly good although there were areas of turbulence. Dave kindly agreed to handle the controls for launch whilst I gave it good shove out into the lift. Off she went, straight and true and virtually no trimming required. I took over after Dave had checked her out. She is a bit twitchy and required some gentle control. Flies like she is on rails. Turns are excellent and she climbs well. Very impressed indeed. Will need to grow into her as she is a lot quicker and reactive than anything I have flown so far. Second flight Dave tried a roll and she was much quicker and tighter than he expected.
Overall lovely sloper and hope I can do her justice 😀 My thanks to Dave once again for his patience and interest in us rookies.